


How to Hike Rocky Mountain National Park's Emerald Lake
Introduction Rocky Mountain National Park’s Emerald Lake is one of the most stunning alpine destinations in Colorado. Nestled amidst towering peaks and lush meadows, the hike to Emerald Lake offers breathtaking views, abundant wildlife, and a refreshing escape into nature. This guide will provide a comprehensive walkthrough on how to hike to Emerald Lake, making it accessible for beginners and rew
Introduction
Rocky Mountain National Parks Emerald Lake is one of the most stunning alpine destinations in Colorado. Nestled amidst towering peaks and lush meadows, the hike to Emerald Lake offers breathtaking views, abundant wildlife, and a refreshing escape into nature. This guide will provide a comprehensive walkthrough on how to hike to Emerald Lake, making it accessible for beginners and rewarding for seasoned hikers alike. Whether you are planning a day trip or a longer exploration, understanding the trail, best practices, and essential gear will ensure a safe and enjoyable adventure.
Step-by-Step Guide
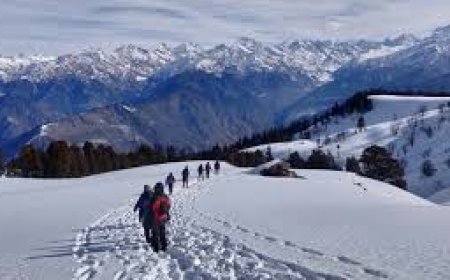
1. Planning Your Trip
Before heading out, its essential to plan your hike carefully. The Emerald Lake Trail is located in the Bear Lake Trailhead area of Rocky Mountain National Park. The trail is approximately 3.6 miles round trip with an elevation gain of around 650 feet, making it moderate in difficulty. Check weather conditions and park alerts to avoid unexpected closures or hazards.
2. Getting to the Trailhead
The Bear Lake Trailhead is the most popular access point for the Emerald Lake hike. From Estes Park, drive west on Bear Lake Road for about 10 miles. Parking can fill up quickly during peak season (summer and early fall), so arriving early in the morning or late afternoon is recommended. There is also a free shuttle service during busy times, which helps reduce traffic congestion.
3. Starting the Hike
Begin your hike from the Bear Lake Trailhead, following well-marked signs toward Nymph Lake, your first major waypoint. The trail is well-maintained and mostly shaded, which makes for a pleasant start. The walk to Nymph Lake is about 0.5 miles, offering beautiful views of wildflowers and the surrounding forest.
4. Proceeding to Dream Lake
From Nymph Lake, continue upward for another 0.7 miles to reach Dream Lake. The trail becomes a bit steeper here, so pace yourself and enjoy the panoramic views of Hallett Peak and Flattop Mountain. Dream Lake is a perfect spot for a short rest, and the reflective water surface makes for fantastic photo opportunities.
5. Final Stretch to Emerald Lake
The last leg of the hike is approximately 0.5 miles from Dream Lake. This section gains more elevation but rewards hikers with stunning vistas of the surrounding mountain ranges. Emerald Lake itself is a pristine alpine lake surrounded by tall granite cliffs and alpine meadows. Take time to explore around the lake, enjoy a packed lunch, or simply relax soaking in the natural beauty.
6. Returning to Bear Lake Trailhead
Retrace your steps on the same trail back to Bear Lake Trailhead. Descending is generally quicker, but remain cautious on uneven terrain. Allow extra time if you want to stop and enjoy the scenery or take photos along the way.
Best Practices
1. Leave No Trace Principles
Practice responsible hiking by adhering to Leave No Trace principles. Pack out all trash, avoid disturbing wildlife, and stay on designated trails to protect the fragile alpine environment.
2. Start Early to Avoid Crowds
Emerald Lake is a popular destination. Starting your hike early in the morning helps you avoid crowds and parking challenges while enjoying a more peaceful experience.
3. Dress Appropriately
Wear layered clothing suitable for changing mountain weather. Waterproof jackets, sturdy hiking boots, and moisture-wicking fabrics will keep you comfortable throughout the hike.
4. Carry Sufficient Water and Snacks
Hydration is crucial at high altitudes. Bring at least 2 liters of water per person and carry high-energy snacks like nuts, trail mix, or energy bars.
5. Know Your Limits
If you are new to hiking or not accustomed to elevation, pace yourself and take frequent breaks. Altitude sickness can affect even experienced hikers.
6. Use Sun Protection
The suns rays are stronger at higher elevations. Apply sunscreen, wear a hat, and use sunglasses to protect your skin and eyes.
Tools and Resources
1. Trail Maps
Obtain a detailed map of Rocky Mountain National Park before your hike. Printable maps are available on the National Park Service website, and several mobile apps provide offline trail maps.
2. Hiking Apps
Apps such as AllTrails, Gaia GPS, and Hiking Project offer real-time GPS tracking, user reviews, and photos. They are helpful for navigation and planning.
3. Weather Forecast Tools
Check reliable weather forecasts on websites like NOAA or Weather.com to prepare for sudden changes typical of mountain environments.
4. Park Information
Visit the official Rocky Mountain National Park website for up-to-date trail conditions, alerts, shuttle schedules, and permit requirements.
5. Essential Gear
Some recommended gear includes a daypack, trekking poles, first aid kit, map or GPS device, water bottles, snacks, layered clothing, and a camera to capture the stunning scenery.
Real Examples
Example 1: Family-Friendly Hike
The Johnson family from Denver took the Emerald Lake hike with their two children aged 10 and 12. They started early, used trekking poles for support, and took plenty of breaks. The kids enjoyed spotting wildlife and playing by the lakeshore. The total hike took them about 3.5 hours, including stops.
Example 2: Solo Hiker Experience
Maria, an experienced solo hiker, completed the hike in under 2.5 hours. She emphasized the importance of starting early to avoid crowds and shared photos of the crystal-clear water and mountain reflections. Maria used a GPS app and carried a portable charger to ensure her phone stayed powered throughout the trip.
Example 3: Group Adventure
A group of friends from Boulder planned a weekend trip including the Emerald Lake hike as a highlight. They combined the hike with camping at nearby Moraine Park. The group found that sharing gear and pacing themselves made the hike enjoyable for all fitness levels.
FAQs
How long does the hike to Emerald Lake take?
The average round-trip hike takes about 3 to 4 hours, depending on your pace and time spent at the lake.
Is the Emerald Lake hike suitable for beginners?
Yes, the trail is moderate in difficulty and well-maintained, making it accessible for beginners with a reasonable fitness level.
Are dogs allowed on the trail?
Dogs are not permitted on the trails in Rocky Mountain National Park to protect wildlife and natural resources.
Can I swim in Emerald Lake?
Swimming is generally discouraged due to cold water temperatures and ecological sensitivity.
Is there cell phone reception along the trail?
Cell service is limited and unreliable in many parts of the park. Its best to prepare accordingly and not rely on your phone for emergencies.
Conclusion
Hiking to Emerald Lake in Rocky Mountain National Park is a rewarding experience blending breathtaking natural beauty with accessible adventure. Proper planning, adherence to best practices, and the right gear will help ensure your hike is safe, enjoyable, and memorable. Whether you are a first-time visitor or a returning outdoor enthusiast, Emerald Lake offers a quintessential Rocky Mountain experience that should not be missed.