


How to Hike the Temblor Range Extension Final
Introduction The Temblor Range Extension Final is a captivating hiking experience that offers adventurers a unique blend of rugged terrain, expansive views, and geological wonders. Nestled in the heart of California’s diverse landscapes, this trail extension has become increasingly popular among hikers seeking a challenging yet rewarding outdoor excursion. Understanding how to hike the Temblor Ran
Introduction
The Temblor Range Extension Final is a captivating hiking experience that offers adventurers a unique blend of rugged terrain, expansive views, and geological wonders. Nestled in the heart of Californias diverse landscapes, this trail extension has become increasingly popular among hikers seeking a challenging yet rewarding outdoor excursion.
Understanding how to hike the Temblor Range Extension Final is essential for both novice and experienced hikers. This tutorial will guide you through every aspect of the hike, from preparation to execution, ensuring you enjoy the journey safely and fully. Whether you are drawn by the stunning vistas, the chance to explore a less-trodden path, or the physical challenge, this guide provides a comprehensive resource to help you succeed.
Step-by-Step Guide
Step 1: Planning Your Hike
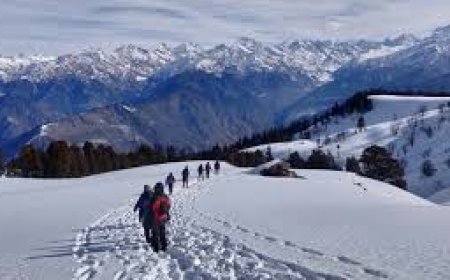
Begin by researching the trail details, including distance, elevation gain, and expected duration. The Temblor Range Extension Final typically spans approximately 12 miles with moderate to difficult terrain. Check local weather forecasts to ensure safe hiking conditions, and consider the best season to visitspring and fall often provide ideal temperatures.
Step 2: Preparing Your Gear
Proper equipment is crucial. Essential items include:
- Footwear: Sturdy hiking boots with good ankle support.
- Clothing: Layered clothing to adapt to temperature changes.
- Navigation tools: Map, compass, or GPS device.
- Hydration: At least 3 liters of water, considering the dry climate.
- Food: High-energy snacks and a packed lunch.
- Safety gear: First aid kit, whistle, and sun protection.
Step 3: Arrival and Trailhead Orientation
Locate the official trailhead for the Temblor Range Extension Final, often accessed via State Route 58. Arrive early to avoid parking congestion and to maximize daylight hours. Take time to study trail markers and signage before starting your hike.
Step 4: Beginning the Hike
Start your hike at a steady pace to warm up muscles and conserve energy. The initial segment usually involves moderate inclines through chaparral and grasslands. Stay on designated paths to protect the environment and ensure your safety.
Step 5: Navigating Challenging Sections
As you progress, be prepared for steeper ascents and rocky terrain. Use trekking poles if available to improve balance and reduce strain. Take short breaks at scenic overlooks to hydrate and appreciate the panoramic views.
Step 6: Reaching the Extension Final Point
Upon reaching the trails final extension, take time to enjoy the unique geological formations and sweeping vistas of the Carrizo Plain and surrounding mountain ranges. This is an excellent spot for photography and rest before beginning your return.
Step 7: Returning Safely
Retrace your steps carefully, keeping an eye on trail markers and potential hazards. Monitor your energy levels and hydration status. Plan to finish your hike well before dusk to avoid navigating in low light.
Best Practices
Respect the Environment
Stay on marked trails to minimize erosion and protect native flora and fauna. Avoid disturbing wildlife and pack out all trash to leave the trail pristine for future hikers.
Maintain Proper Hydration and Nutrition
Drink water regularly, even if you dont feel thirsty, and consume energy-rich snacks to maintain stamina. Dehydration is a common risk in the dry climate of the Temblor Range.
Practice Leave No Trace Principles
Follow the seven Leave No Trace principles, including planning ahead, disposing of waste properly, and minimizing campfire impact if camping overnight.
Prepare for Variable Weather
The Temblor Range can experience sudden weather changes. Carry layers and waterproof gear to stay comfortable and safe.
Inform Someone of Your Plans
Always let a trusted person know your hiking itinerary and expected return time in case of emergencies.
Tools and Resources
Maps and Navigation
Topographic maps from the USGS or digital apps like Gaia GPS and AllTrails provide detailed trail information. Download maps offline when possible.
Weather Forecasting
Use reliable weather websites or apps such as NOAA or Weather.com to monitor conditions before and during your hike.
Equipment Suppliers
Outdoor retailers like REI or Backcountry offer quality hiking gear tailored to the demands of the Temblor Range terrain.
Local Hiking Groups and Forums
Engage with communities on platforms like Meetup or Reddit for tips, trail updates, and group hikes.
Real Examples
Example 1: Solo Hiker Experience
Jane, an experienced solo hiker, completed the Temblor Range Extension Final in early spring. She noted the importance of early morning starts to avoid afternoon heat and emphasized the rewarding views at the summit. Jane recommended trekking poles to handle the rocky sections and shared photos highlighting the blooming wildflowers.
Example 2: Group Hiking Adventure
A group of five friends tackled the extension in October, enjoying mild temperatures and clear skies. They coordinated carpooling to the trailhead and carried shared gear to reduce individual load. The group found the trails remote sections peaceful and reported wildlife sightings including hawks and mule deer.
Example 3: Family-Friendly Approach
A family with teenagers chose to hike only the first half of the Temblor Range Extension Final, focusing on accessible viewpoints and shorter distances. They stressed the importance of pacing, frequent breaks, and teaching kids about trail etiquette and safety.
FAQs
How long does it take to hike the Temblor Range Extension Final?
The average time ranges from 6 to 8 hours, depending on fitness level and pace. Planning for a full day is recommended.
Is the trail suitable for beginners?
While parts of the trail are manageable for beginners, the extension final includes steep and rocky segments better suited for hikers with moderate experience.
Are dogs allowed on the trail?
Dogs are permitted but must be kept on a leash at all times. Carry sufficient water and be mindful of wildlife.
What is the best time of year to hike?
Spring and fall offer the most comfortable temperatures and scenic beauty. Summer can be very hot, and winter conditions may include snow at higher elevations.
Are there any permits required?
No permits are generally required for day hiking the Temblor Range Extension Final, but it is advisable to check local regulations before your trip.
Conclusion
Hiking the Temblor Range Extension Final is an enriching outdoor adventure that combines physical challenge with stunning natural beauty. By following this detailed guide, preparing adequately, and respecting the environment, you can ensure a safe and memorable experience on this remarkable trail. Whether you are seeking solitude, panoramic views, or a connection with nature, the Temblor Range awaits your exploration.